Wednesday, May 1, 2013

New frames from Warby Parker


It's time to embrace the four eyes once again. 
Ever since I discovered I needed glasses I wanted nothing more than to wear contacts. After wearing those for more than 6 years I now wanted nothing more than a nice smart pair of glasses and I've found them. Say hello to my new Tenley Warby Parkers. I got them in the shade Midnight Blue knowing that they would appear almost black in most lighting and I'm so pleased with the way they look. 

For those of you who don't know, Warby Parker is an online optical store that offers costumers affordable and stylish glasses for a fraction of the price. All glasses are set at the standard price of $99 for American costumers and $120 for Canadians and this includes the frames and anti-reflective pre-scripted lens. Because it's an online store, they offer you the chance to select 5 frames you want to try out and WP will send them to you free of charge for a 5 day trial period for you to try them on. Only drawback is that it's exclusively for American citizens. So my only option was to photoshop each frame onto my face. They do have virtual-try-on's available on their website but that was just not doing it for me. If you weren't sold yet, just wait till you hear this. Not only are you buying glasses for an extremely affordable price, but they give a pair to someone in need for every pair you purchase, Aww!

***

I had some issues with the initial shipping process, but that was only because I forgot to send in my PD measurements and they couldn't ship my glasses until I had sent them in. After that, and a few emails with their lovely costumer service representatives my glasses were well on their way. It took 4 days for my glasses to arrive from the Friday I received my confirmation email to the Monday afternoon when they arrived on my door step. Such speedy shipping!

Overall, I'm extremely pleased with everything and I hope I can buy another pair when I go to one of their showrooms in New York this summer. 


Till Next time! xx

Find me here:


Tuesday, April 30, 2013

The lookbook project


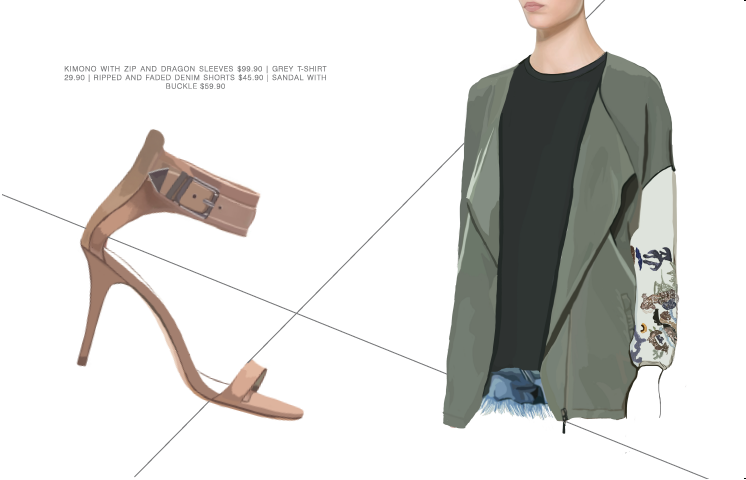
One of my last school projects for the year was to create a lookbook for a company of our choice, being the ZARA fan that I am, I took a whirl at illustrating their TRAFALUC 2013 collection from this past February. We had the choice between illustrating or photographing our images but in a spir of the moment overly-ambitious decision, I thought illustrating the collection would be easy peazy. Boy was I wrong. The jacket alone in the image above took me an entire day.

I wanted the illustrations to look graphic, while having the face and hair look realistic and have them peaking through. The background was going to be suggested and dynamic with the use of lines and I wanted to play with the composition to show the garments in detail at different angles. 


These were all illustrated on my Wacom Bamboo tablet on Photoshop Elements and put together on inDesign.

Till Next time! xx

Find me here:

Sunday, March 24, 2013

Beauty Products I've Been Loving


I imagine a lot of you Canadians have been waiting for the highly raved Wake Me Up collection as much as I have and let's be honest, it's about damn time. It's almost been a year since it's released in the Uk! I was this close to ordering it online and taking a whirl at guessing my shade but then a lovely friend messaged me and told me that she saw it at a Shopper's Drug Mart! Hallelujah! 

I obviously went as soon as I could to pick it up and whilst I was there I figured I could use some other "essentials." This was two months ago and I have now used them long enough to tell you about the reasons why I love them.


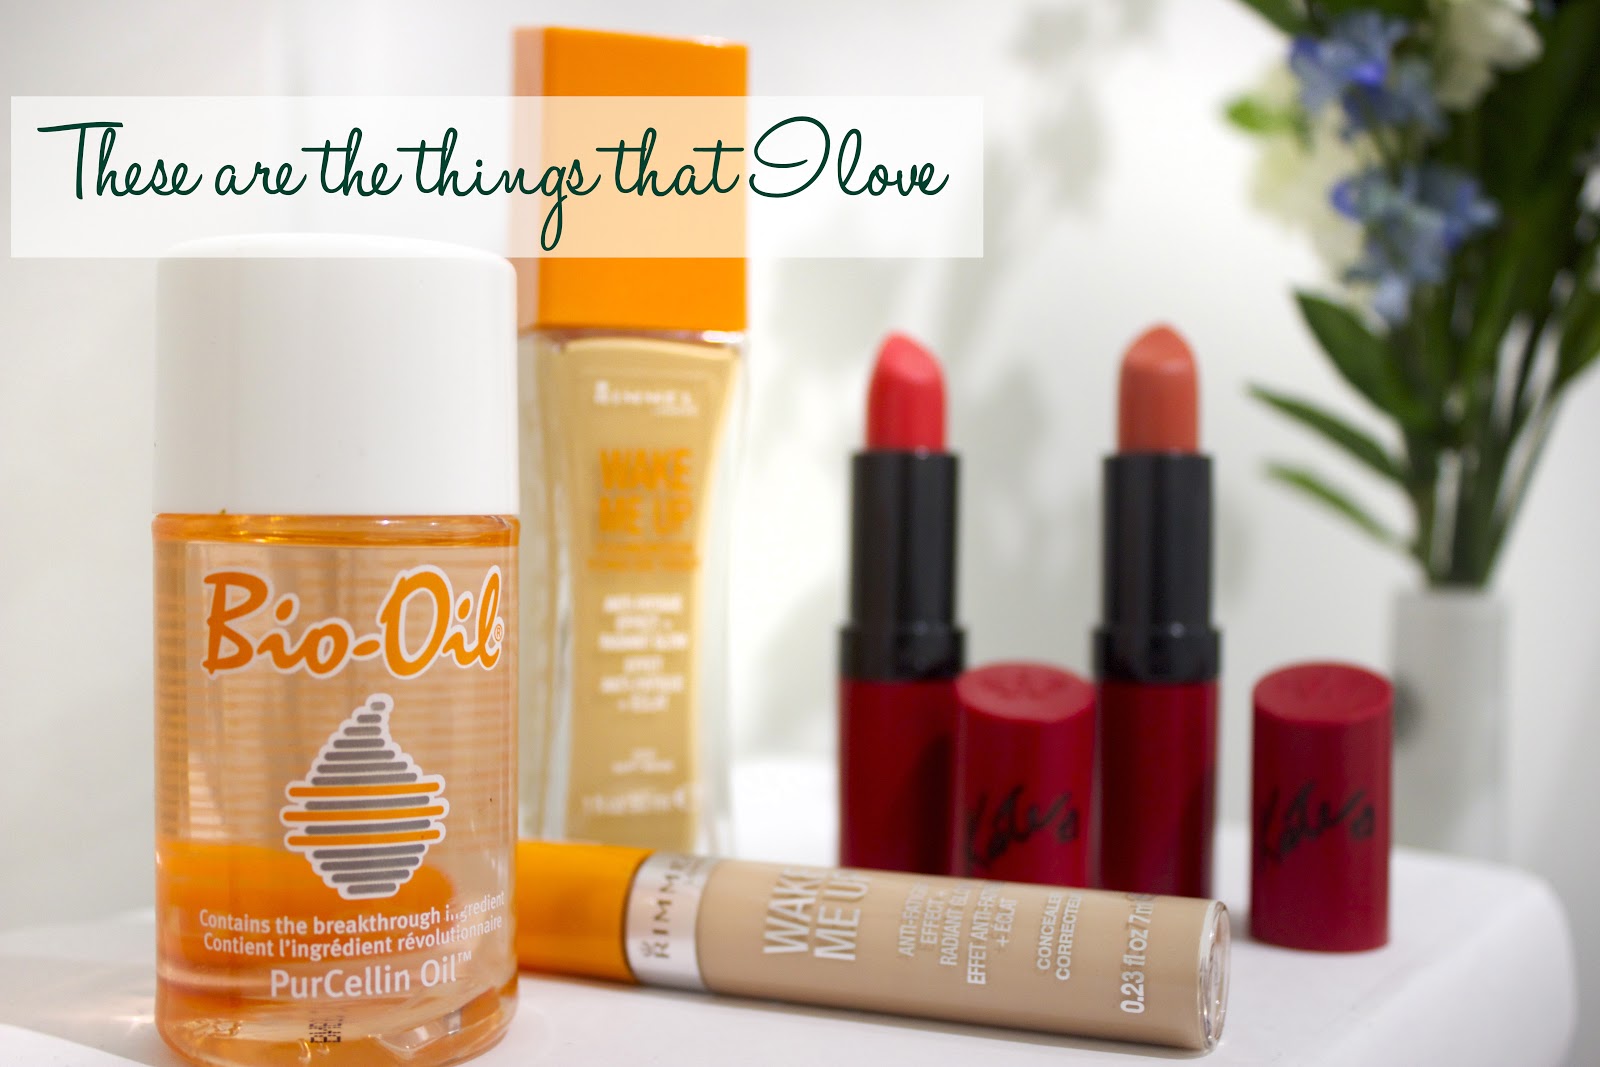
I remember my friend Janelle raving to me about Bio-Oil two years ago and I was laughing because she told me this was used for stretch marks while being pregnant (among its many other purposes). It was funny at the time because Janelle is by no means pregnant and she was using it on her face. I didn't know it served many purposes and after doing some research I found out one of the main things it can help with is dehydrated skin.

Thanks to the windy winter we've had, my eye area has been extremely sensitive so I've been using this at night to help moisturize. It's helped SO much! I even see less fine lines around my eyes where concealer and foundation used to build up in. I know the idea of putting an oil on your face doesn't appeal to everyone but it hasn't broken me out and it can actually help with acne scars!


I've also been loving these two new matte Kate Moss lipsticks in 110 and 109. I think they're very smooth for matte lipsticks and the colours are very opaque. 110 is a very vibrant orange-red and 109 is more of a coral (even if the image makes it come off a bit brown). 

I've been trying to get into the habit of wearing more lipsticks and I feel these are a perfect place to start for the spring and summer.


The long awaited Wake Me Up, I'm going to keep this review short as it has been on the market for quite some time now and all the UK beauty bloggers have already covered it. In regards to the Wake Me Up foundation, it has quickly replaced my old Maybelline FitMe foundation because of the thicker consistency that it offers and the nice pump applicator. It's also less dewy than the FitMe foundation but it still gives a nice natural glow.

***

 The concealer is great as well, good coverage, but not heavy. It might not be good for anyone with a lot of redness to cover up and I'm not very pleased with the shade selection. I picked this one as I thought it would be the best shade for me but it has a bit of a pink undertone which I don't really understand... on the other hand, it's easily blend-able and looks very natural! I still love this product, I may just have to try a different shade the next time.

Have any of you had the chance to try these products out?
Are any of you as happy as I am about Wake Me Up finally being in Canada?
 Let me know down below!

***

Till Next Time xx

Monday, March 18, 2013

The Wearable Art Show


***

Fashion is not art they said.  

We all know that person… 
I would have just loved to see them seated at this week’s Wearable Art Show, where garments were pretty unconventional to their standards.

The show was held last Tuesday at the Gladstone Hotel and I had a wonderful time! I really enjoyed admiring all the garments my friends and colleagues worked hard on over the last few months and I thought I’d share with you some of the shots I managed to take. 
I even doubt my images do some of their garments justice, but we’ll have to thank the dodgy lighting for that.

***


Till Next time! xx

Little side note: I've also started a Facebook page, all my blog posts and youtube videos will be posted there for your viewing experience :)


twitter | tumblr | youtube | instagram | facebook

Thursday, February 14, 2013

CollegeFashionista Feature


Just a quick little post sharing with you all the little street style feature I was a part of on CollegeFashionista. Make sure to check that out here


Image provided by Christina Dun

Thank you to the lovely Christina Dun for featuring me. Check out her blog here :)

Till next time! xx :)

Sunday, February 10, 2013

Broke But Creative | Vintage Picture Frame Wall DIY


Hello Everyone! 
For those of you Ryerson Fashion students that have been wondering, "what do I do with this random tub of glue?" I have a solution for you all! 

I recently got around to filling up all the picture frames on my wall and filmed a little DIY for it on my youtube channel. I wanted the images to look vintage and "worn out" so I found this really cool technique online using an Acrilex Matte Gel, aka. the glue in our kits that no one knew how to use. 

The great thing about this technique is that it's inexpensive and you can use it with a lot of different projects.


Supplies
1. A lot of old magazines - When looking for images keep in mind that everything you transfer will be flipped so no text!
2. Old Paintbrushes - Smooth, new and large paintbrushes would work best but the glue could also destroy them so stick to your old brushes.
3. Acrilex Matte Gel - I got this in my Uni Fashion kit so I'm not sure how much it costs. I'm sure you can find it in your local art supply store (close up image down below).
4. A Ruler
5. Scissors
6. Rubber Cement (optional - I used it for gluing down images in my collage)
7. Exacto Knife 
8. Sheets of Paper - I found that this technique works best with thicker paper; watercolour, and matte print photo paper work the best. You could use regular printing paper but you have to be very careful.
9. Frames (not pictured) - My picture frames were all purchased at the thrift shop and painted white to match.


For the full tutorial watch down below: 


I really love the way this Kate Moss image turned out, I had to touch it up with some black pencil crayon but I think it looks super grungy and antique.


Till Next time! xx


Monday, January 28, 2013

Hot Mess Results of a Blindfold and Makeup


Incase you ever thought I couldn't look any worse than I already do, prepare to be amazed. Ah yes. By the title I'm sure most of you have already guessed that I gave the Blindfolded Makeup Challenge a try... and by try I mean sitting down helplessly as a friend with no co-ordination attempts to do my makeup. 

It was horrible. 

If you can sit through long enough to see the horror unfold in my new video you will witness the results first hand (and bless you for sitting through it). I've just decided to try it out because I always enjoyed watching other YouTubers give this challenge a whirl.... I also thought, "hey, I haven't posted a video in a while so maybe I should do something ridiculous as a laugh". 
It was either this or give myself the Miley haircut.

Here's the video for your entertainment. So when you feel as though your life has turned to shit and need a good laugh, set aside your self-pity and come laugh at me instead. 

Audrey doing my makeup blindfolded:

Me doing Audrey's makeup blindfolded:


Till Next Time xx

twitter | tumblr | youtube | instagram